
Want to cut to the chase and see how it all worked out for us? Check out our post-trip assessment of our van here.

We spent about a year seriously thinking about what type of vehicle to get and looking at classified ads. During our year-long trip through Africa, we slept in a rooftop tent and cooked outside. This setup served us very well, and our first decision was whether to get a camper (live inside) or an SUV with a rooftop tent (live outside). Because we expected a wider variation in climate in the Americas than we experienced in Africa, we decided we wanted to live inside this time. Having just completed 3 months in Alaska and Canada that extended further into the fall season than we had planned, we are very happy with that decision!
The main criteria that we had that most overlanders don’t is the need to seat and sleep 3 people. That pretty much led us to either a crew-cab pickup with a slide-in camper or a van. The van seemed more compact and seems to better utilize the space available, since the living area and the cab are connected.
Sportsmobile is the most well-known name in four wheel drive camper vans, and we looked at a couple of used examples. They were very nice, but the only way we saw them configured to seat three people while driving, short of having our son sit on the bench seat way in the back by himself, was to install a third captain’s chair behind the driver or passenger seat. This left someone sitting in back with poor visibility, and the captain’s chair takes up a huge amount of living space.
We learned about Colorado Campervan on the web, and met with Derek, the owner. He had some great ideas on layout, and was willing to work with us to achieve our goals. He said we could position a third seat between the two passenger seats up front, so that Quinn could have a front row seat with Mom and Dad. Plus, Derek’s pop top is large enough so that he could build a bed for Quinn across the width of the van over the cab. Jen and I also sleep “upstairs” in a bed that folds out over the living area.
We wanted a diesel engine in order to get a single fuel setup. By using a diesel cooktop and a diesel heater and hot water heater, we could avoid the need to mount propane tanks and the need to refill them. The downside of a diesel engine is that anything newer than 2007 requires Ultra Low Sulfur Diesel, which still isn’t available in much of Latin America.
In January of 2012 we found a used 2001 Ford E350 with low miles and a Salem Kroger 4×4 conversion already in place. Witt flew to Jackson Hole, purchased the van, and drove it back. It was a bare cargo van – just metal on the inside. A blank slate from which to start our “build.”
Over the course of the next 18 months, Derek completed the build to our specifications in phases. In the first phase he put in the pop top, the center seat, and some basic furniture. That was ready in time for us to drive the van to the Overland Expo in 2012.
Even though we had the center seat as far forward as it would go, it intruded into the kitchen area a little and left us with some difficult choices on how to best use the space available. We ended out re-designing the kitchen cabinets and Derek pulled out the basic unit he had put in originally and built a new one based on designs we gave him.
A picture is worth 1000 words. Here are some pictures of the interior layout:
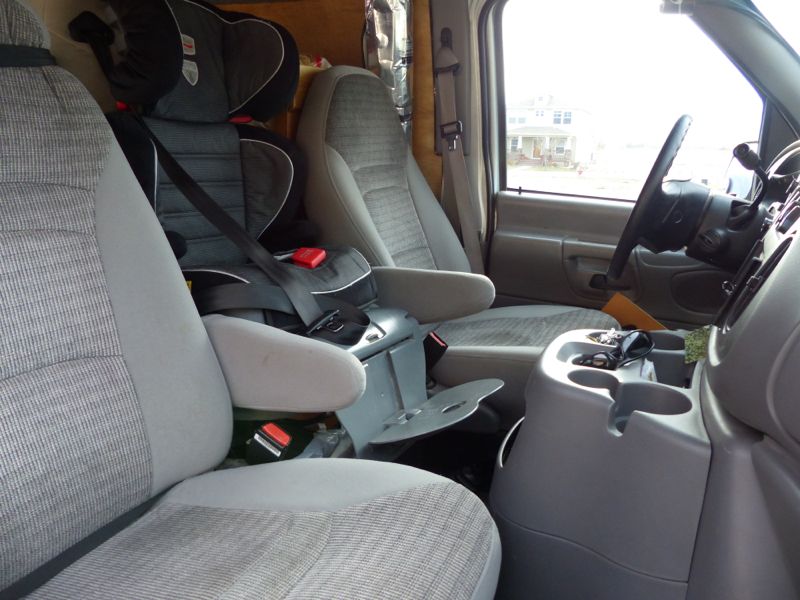
The cab with Quinn’s seat in the center. It’s a regular car seat with a child booster seat. It puts his head at the same level as dad’s and gives him a great view. The center seat can swivel 180 degrees to provide additional “camper” seating.
Looking in from outside the sliding door. The grey seatback you can see is the center seat.
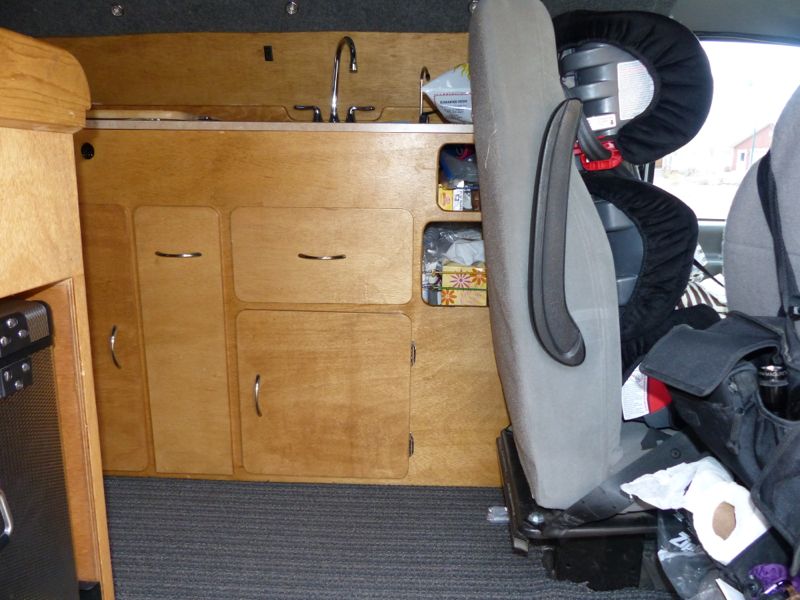
In the photo above, the center seat blocks access the front part of the kitchen cabinets, so we couldn’t put any doors or drawers there. There are two open cubbies near the top, and the space underneath is occupied by the fresh water tank.
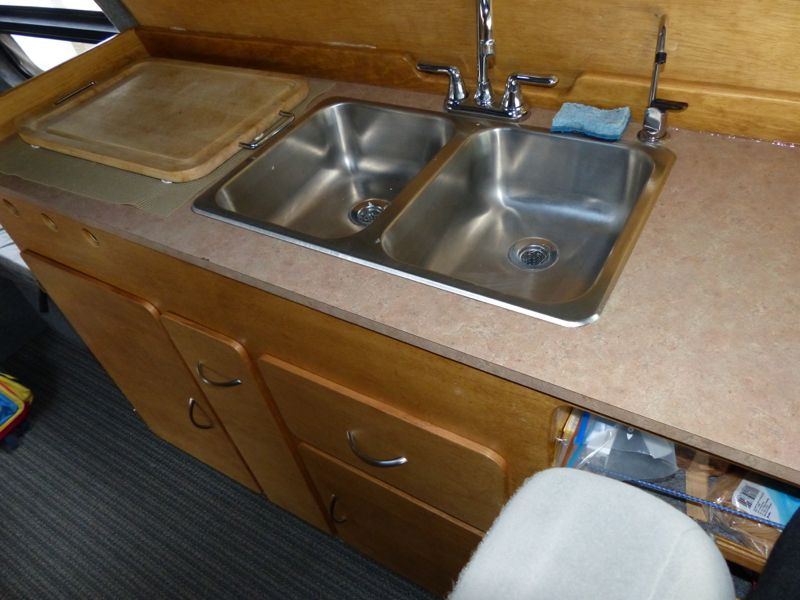
The kitchen cabinets on the driver’s side. The diesel cooktop is under the cutting board on the left.
The silver box is our National Luna fridge/freezer. It slides out on a tray, and there’s a drawer above it with a countertop above that.
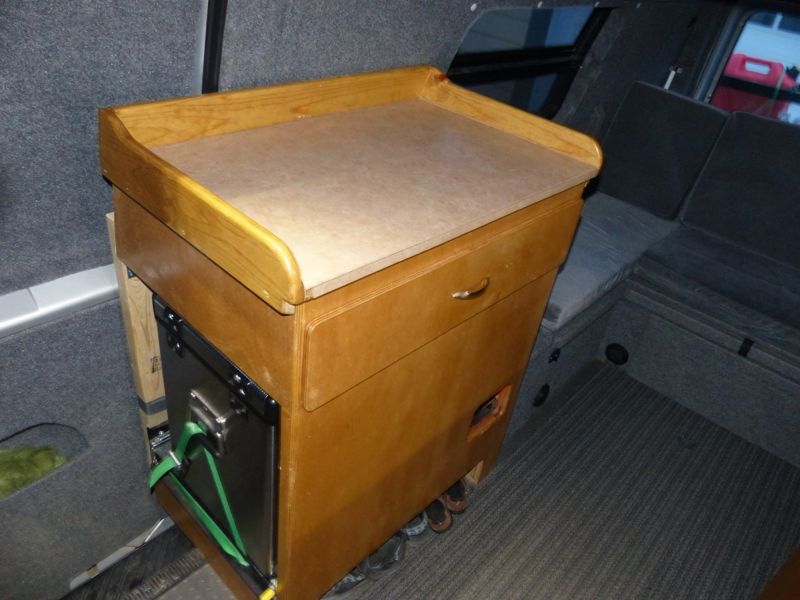
The cabinet housing the fridge
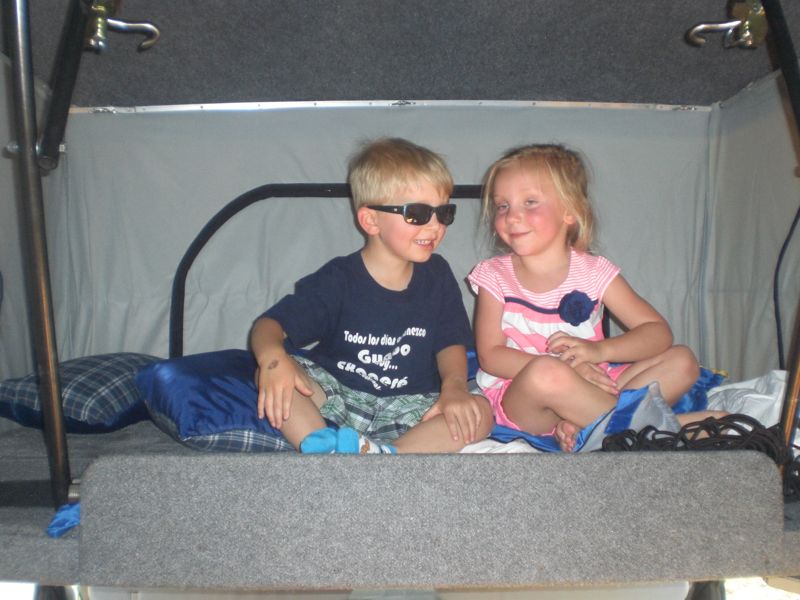
Quinn’s bed up top. He can also sleep in the dinette area below. (Neither of these kids are Quinn)
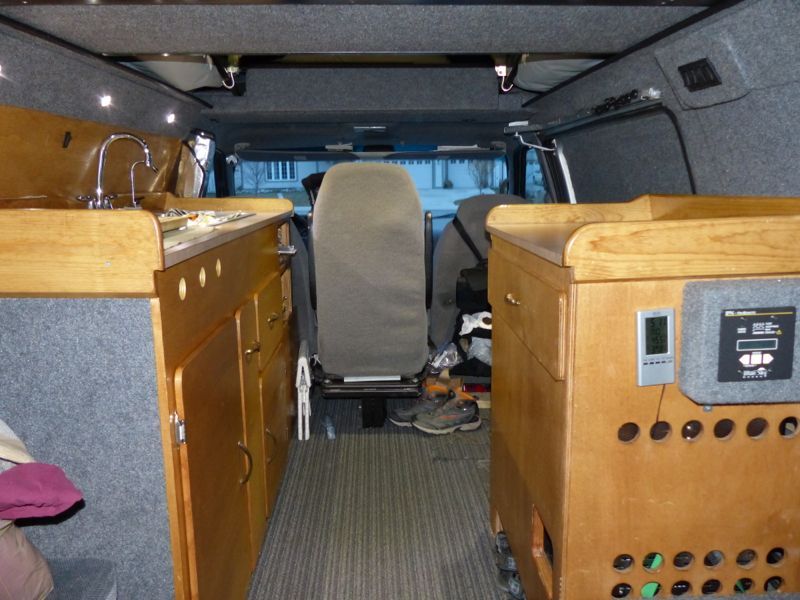
Looking forward from the dinette. The solar charge controller is on the right.
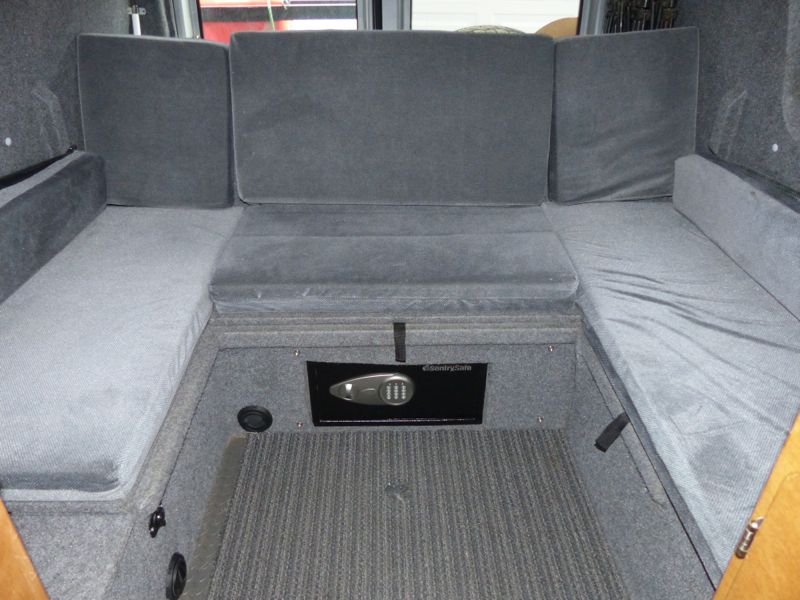
Behind the cabinets is a dinette seating area. A removable table fits in the middle, and if we place the table top in the empty space without it’s stand and put a cushion on top of it, the dinette area can become another bed. The black box under the middle seat is a safe; there’s a cover that snaps over it to hide it and protect it. Three separate storage areas are accessible under the cushioned seats.
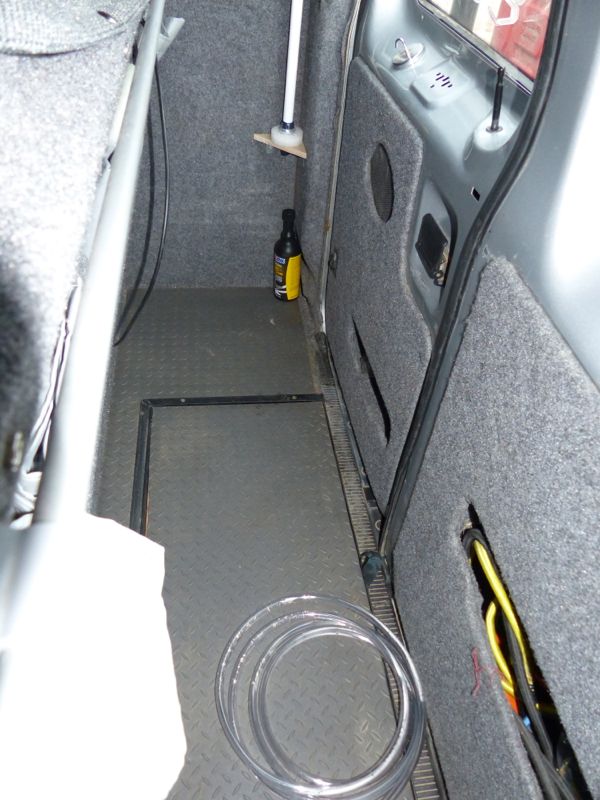
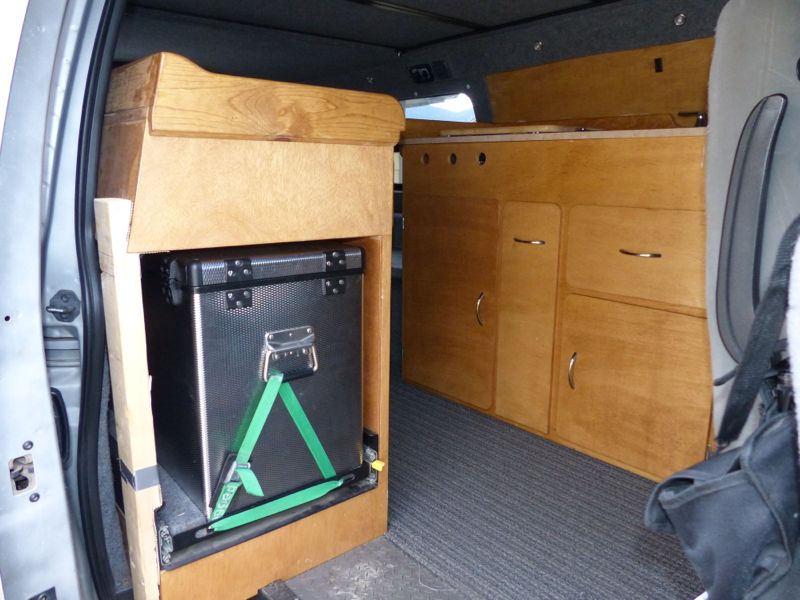
There’s an 18 inch space between the back of the dinette and the rear doors of the van. It’s big enough for our outdoor chairs, 3 small ActionPackers (cargo boxes), and whatever miscellaneous stuff we throw on top. There’s a small under-floor compartment too.

Our shower stall is built using magnets and a blue tarp
The Van
2001 Ford E350 Extended Body
7.3 Liter Diesel Engine
Salem Kroger 4×4 Conversion
Dana 60 axles front and rear with 4.10 ratio
Aluminess rear bumper with swing-away spare tire carrier and Galley box
285/75 R16 tires
Pioneer in-dash DVD player with backup camera
Full quietride insulation throughout the van
AirLift rear air bags
Camper Systems
14 Gallon fresh water tank with external fill and hookup
12V water pump pressurizes water system
Dual basin sink drains to outside. No grey water tank. We use a bucket instead.
Separate drinking water tap routed through an Everpure water filter
Water is plumbed into a Webasto Dualtop heater/hot water heater mounted under the van.
Whale Twist deck shower is accessible from the back of the van.
All plumbing, including the water tank, is inside the insulation layer of the van
Colorado Campervan power pop top with insulated double wall canvas and no-see-um screens.
Smart Battery 100AH lithium-ion house battery
Battery isolator charges the house battery from the alternator when the engine is running and separates them when stopped
100W solar panel mounted on roof
Blue Sky solar charge controller (can handle up to 400W)
800W inverter
12V power ports in dinette and in the cabinets under the seating area
USB power port in dinette
Jefa Tech Wifi repeater with antenna mount on the roof
LED interior lighting
Fantastic Fan ventilation system
National Luna Weekender Twin 12V fridge/freezer
Webasto X100 diesel cooktop
Webasto dualtop diesel space heater and hot water heater
Build Cost
Here’s a breakdown of the costs of the major components of the van, including installation:
Used van: $19,500
Pop-top roof, center jumpseat, and QuietRide insulation: $9000
Building interior furniture: $3800
Fridge: $2000 (w/slide out)
LiIon house battery: $1500
Rear tire carrier: $3500
Diesel cooktop/heater: $6250
Awning: $1000
Solar system, new shocks, and airbags: $5000
This isn’t everything; some labor costs aren’t included here, and we also bought new tires and did some other maintenance that you wouldn’t need if you were starting with a new vehicle. When all was said and done, we spent about $70,000 including the purchase of the van.
Hey now! That should read “Witt and Kirk were flown to Jackson Hole by David to pickup the van and drive it back.” A completely unloaded van in high winds on I-80 is “challenging.”
Yep, you’re absolutely right. Thanks for setting me straight!
Can you please provide a total cost, or breakdown? thanks!
See above. I added some information on the cost of our build to the page. Please let me know if you want any details on anything.
Hello! We just met Josh and Shannon who told us about your van – we are travelling in a very simple Tacoma + campershell setup but are planning on being on the road another 2 years and are thinking about a 4WD E350 as well. We’d love to chat a bit via email about your experiences if you don’t mind, as we are pondering selling the Tacoma in Panama, flying home, outfitting a van, then freighting the van to Cartegena to continue. Please drop me a line – [email protected]. Hope you’re having fun and say hi to Leanne and Calvin for us!